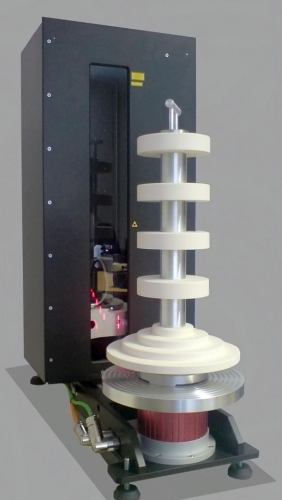
In rotary piston pumps, as the rotary pistons are responsible for the flow of the delivery medium, the specified geometrical shape of the pistons must be extremely precise and accurate. Two rotary pistons need to mesh exactly with one another as the pump rotates, with movement of the pistons terminating just before the wall housing. The life of the pump can therefore only be maintained if the piston surface fits precisely with the pump housing. This means that the whole of the piston surface needs to be measured and compared with the target shape to very strict tolerances.
Qsigma GmbH based in Kassel, Germany, has developed a universal 3D measuring machine for these types of applications and Micro-Epsilon’s scanCONTROL 2700 laser profile scanner with a 50mm measuring range is used to record the shape or profile of the piston’s surface. For larger components, the profile scanner can be traversed vertically using a linear motion system.
In addition, an optoNCDT 2200 laser displacement sensor from Micro-Epsilon with a 200mm measuring range is integrated to the Qsigma measuring machine in order to determine the precise position of the component. The optoNCDT 2200 sensor acquires 10,000 distance values every second, operating at a resolution of 3µm.
The piston rotates during measurements. Only five seconds are required for an automatic inspection of the piston. After successfully scanning the surface geometries, the data is compared with those of the target object. In addition to rotary pistons, the system can also be used to measure other rotationally symmetrical objects.


